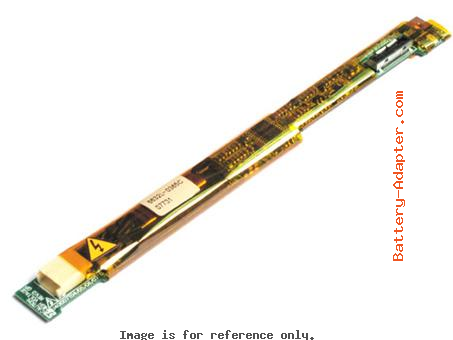
Nuevo Inversor DELL Inspiron 1520 1525 Series
€
16.98
Pliego de condiciones: Se adapta a 14 "14.1" 15 "15.4" pantallas LCD
Unidad: PCS
Tipo: Laptop LCD Inverter
Condición: Nuevo
Garantía: 3 Meses
Peso: 50,00 g
Disponibilidad: en stock
Pago | Envíos: PayPal | Hong Kong por correo aéreo registrado con número de seguimiento
Envío gratis a la gama de todo el mundo!
Unidad: PCS
Tipo: Laptop LCD Inverter
Condición: Nuevo
Garantía: 3 Meses
Peso: 50,00 g
Disponibilidad: en stock
Pago | Envíos: PayPal | Hong Kong por correo aéreo registrado con número de seguimiento
Envío gratis a la gama de todo el mundo!
Inversor Part#
6632L-0267B E200002589-00 K02I115.05 LF K08I024.01 LJ97-01531A LP154W02-B1K6 LP154W02-B1K7 LP154WU1-A1K3 U40I008T04
Compatibles
Dell:
Inspiron 1420 Series Inspiron 1501 Series Inspiron 1520 Series Inspiron 1525 Series Inspiron 6400 Series Inspiron E1405 Series Inspiron E1505 Series Latitude D520 Series Latitude D600 Series Precision M65 Series Vostro 1500 Series XPS M140 Series
Inspiron 1420 Series Inspiron 1501 Series Inspiron 1520 Series Inspiron 1525 Series Inspiron 6400 Series Inspiron E1405 Series Inspiron E1505 Series Latitude D520 Series Latitude D600 Series Precision M65 Series Vostro 1500 Series XPS M140 Series
La guía de instalación del pantalla y el inversor LCD Dell Inspiron 1520 / 1525
Remove Dell Inspiron 1520 / 1525 Screen & Inverter-1
Remove Dell Inspiron 1520 / 1525 Screen & Inverter-3

Remove Dell Inspiron 1520 / 1525 Screen & Inverter-5
Remove Dell Inspiron 1520 / 1525 Screen & Inverter-7
Remove Dell Inspiron 1520 / 1525 Screen & Inverter-9
Remove Dell Inspiron 1520 / 1525 Screen & Inverter-11
Remove Dell Inspiron 1520 / 1525 Screen & Inverter-13
|
In this case, the actual laptop is Dell Inspiron 1525, and the disassembly procedure of Dell Insprion 1520 is the same. In fact, their inverters are the same. And you can find the inverter compatible models under this instruction.
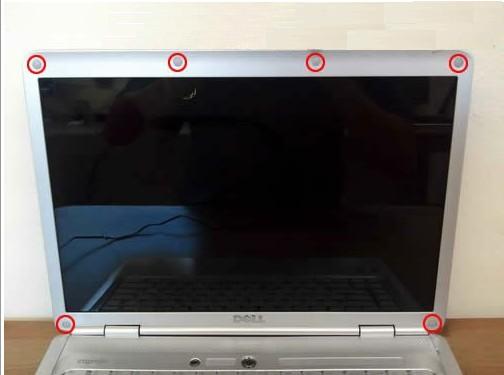
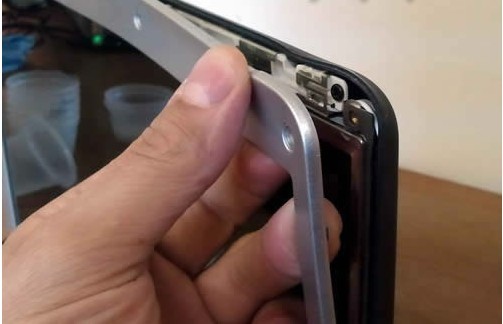
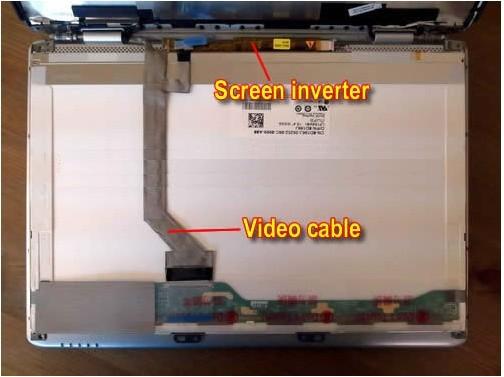
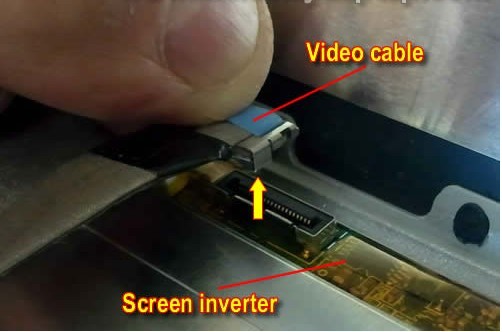
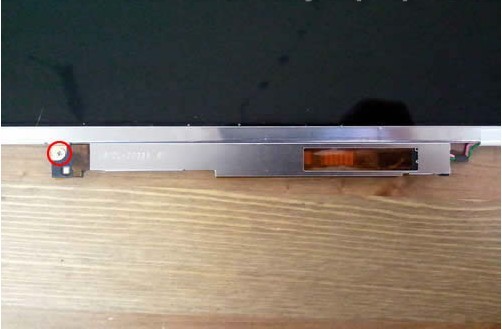
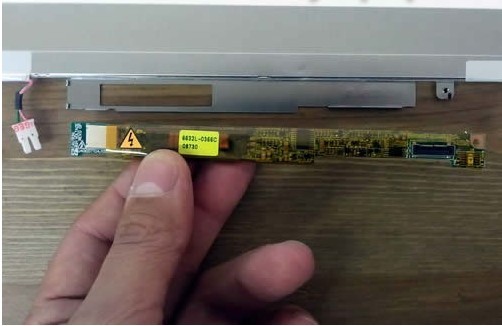
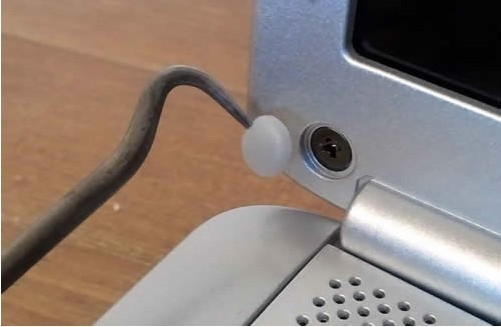
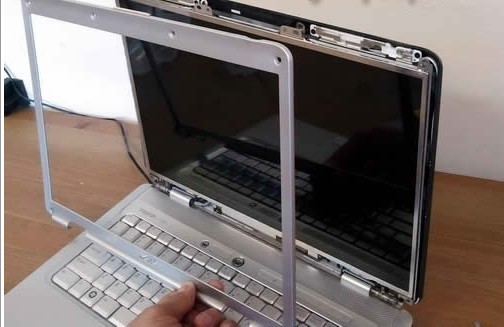
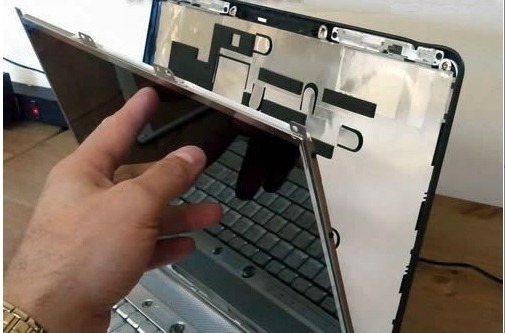
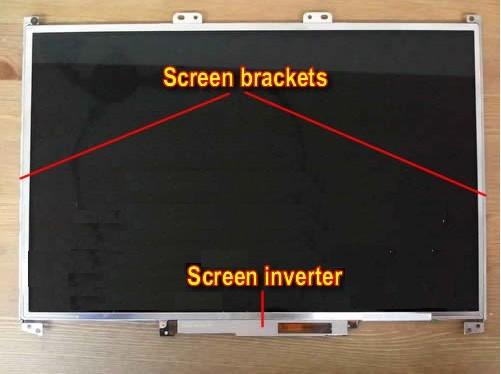
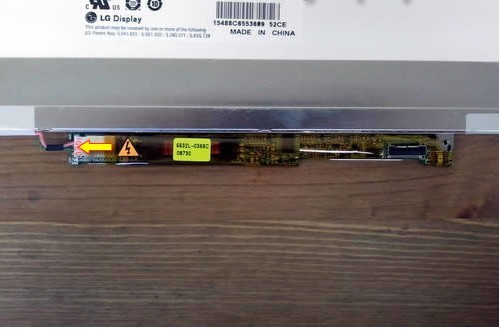
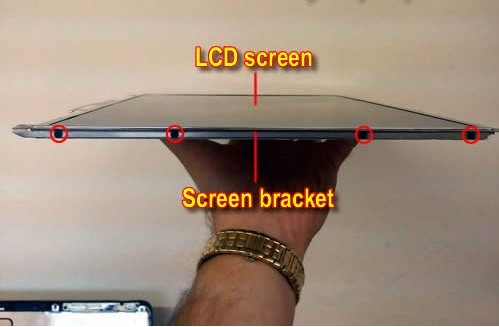
In order to remove the LCD screen and inverter board we’ll have to take apart the display assembly. Before you start, make sure the laptop is turned off and battery removed. STEP 1. There are six rubber screw covers on the screen bezel. Remove all covers with a sharp object. You can blue covers on the screen bezel so they don’t get lost. STEP 2. Now remove all six screws found under those covers. STEP 3. Start separating the screen bezel from the display cover. You may use a piece of plastic as case cracker. Insert fingers under the bezel and carefully wiggle the bezel until it separates from the cover. STEP 4. On the bottom the bezel could be glued to the LCD screen with double sticky tape. Carefully separate bezel from the screen. Remove the screen bezel. STEP 5. Remove two screws securing the LCD screen assembly to the display hinges. STEP 6. Carefully separate the LCD screen assembly from the display cover and place it face down on the keyboard. STEP 7. Now you can access the back side of the LCD screen. The Dell Inspiron 1525 inverter board mounted into the bracket on the LCD screen. STEP 8. Disconnect video cable from the LCD screen. STEP 9. Disconnect another video cable connector from the Dell Inspiron 1525 inverter board. STEP 10. The LCD screen assembly has been removed. There are two mounting brackets on both side of the screen and inverter board on the bottom. STEP 11. Remove one screw securing the Dell Inspiron 1525 inverter board to the bracket. STEP 12. Turn the LCD screen assembly over and disconnect the backlight cable from the left side of the Dell Inspiron 1525 inverter. STEP 13. Now you can remove the inverter board and replace it with a new one if needed. You can find the Dell Inspiron 1525 Inverter here. STEP 14. If you want to replace the screen, you can remove left and right mounting brackets and transfer them to the new screen. In order to remove the bracket after the LCD screen has been removed, simply remove four screws on the side. |
Remove Dell Inspiron 1520 / 1525 Screen & Inverter-2
Remove Dell Inspiron 1520 / 1525 Screen & Inverter-4
Remove Dell Inspiron 1520 / 1525 Screen & Inverter-6

Remove Dell Inspiron 1520 / 1525 Screen & Inverter -8
Remove Dell Inspiron 1520 / 1525 Screen & Inverter-10
Remove Dell Inspiron 1520 / 1525 Screen & Inverter-12
Remove Dell Inspiron 1520 / 1525 Screen & Inverter-14
|
