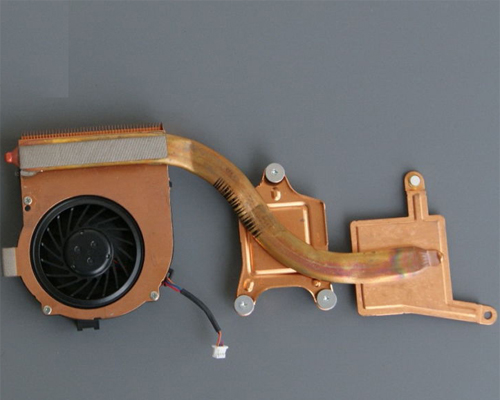
La guía de instalación del ventilador CPU Lenovo / IBM Thinkpad X200
Nuevo ventilador de Lenovo Thinkpad X200 - 45N4782
€
25.44
Especificaciones: 100% 100% PROBADO EL TRABAJO Y PASAR LA PRUEBA DE RUIDO
Unidad: PCE
Condición: Nuevo
Garantía: 3 Meses
Info: 3-hilos 3-pin conector
Disponibilidad: en stock
Pago | Envíos: PayPal | Hong Kong por correo aéreo registrado con número de seguimiento
Envío gratis a la gama de todo el mundo!
Unidad: PCE
Condición: Nuevo
Garantía: 3 Meses
Info: 3-hilos 3-pin conector
Disponibilidad: en stock
Pago | Envíos: PayPal | Hong Kong por correo aéreo registrado con número de seguimiento
Envío gratis a la gama de todo el mundo!
Compatible Fan Part #:
44C9550 45N4782
Compatible Laptop model#:
ThinkPad X200 Series
La guía de instalación del ventilador Lenovo / IBM Thinkpad X200
|
Fist of All, please shut down your Thinkpad X200. Disconnect the AC adapter and remove the battery.
1. Turn the Thinkpad X200 upside down, Unscrew all the screws marked in the picture. Remove the DIMM cover and remove the DIMM card. 2. Remove four screws securing the Thinkpad X200 keyboard on the bottom of the laptop. 3. Open the Thinkpad X200 and push the keyboard toward the screen a little, then lift up the keyboard from the bottom of the keyboard. 3. Lift up the keyboard, now you can access the keyboard cable, detach the cable connector. Remove the Thinkpad X200 keyboard. 4. Uplug the ribble cable of the fingerprint reader. Some laptops doesn't have the fingerprint reader, skip this step. Removal the palm rest. 5. Now, you can access the Thinkpad X200 motherboard. Gently uplug the antenna RF connectors and remove the two screws securing the wireless LAN card. Remove the wireless Lan card. When installing: In models with wireless LAN card that has two antenna connectors, plug the gray cable into the jack labeled MAIN or M on the card, and the black cable into the jack labeled AUX or A. If the computer you are servicing has three cables, put the white cable in the cable protection tube. In models with wireless LAN card that has three antenna connector, plug the gray cable (MAIN) into the jack labeled TR1, the white cable (3rd) into jack labeled RO or TR3, and the black cable (AUX) into jack labeled TR2 on the card. 6. Unplug the vide cable. 7. Open the HDD door and pull out the HDD. 8. Unlock the connetor of HDD cable, unplug the HDD cable. 9. Remove the top shielding assembly. If there is screw securing it, please remove the screw. 10. Loose the VGA connector, you can do it by a screw driver. 11. Lift up the motherboard as shown, unplug the DC-in connector cable. Now, you can remove the motherboard. 12. Turn over the motherboard, remove the four screws and uplug the fan cable. You can install you new Thinkpad X200 fan assembly now. 13. If you want to clear the fan only, you can take out the fan by opening the fan cover, you need to unscrew three screws and pry up the clips only. |
